Hi Everyone!!
I’ve been swatching my reinker bottles all weekend and wanted to share my process with you. I don’t know about you – but it’s hard to tell which color is which when you’re looking down at a box full of reinkers. So I spent a lot of time stamping and making swatches of all the ink.
My Xyron Creative Station has been put to good use! I’ve had it over 3 years and hardly think to use it. Such a shame because it would be so helpful when die cutting word sentiments (mental note made for the future).

The above photo is one I shared on an Instagram story and I had to take a screenshot of it to share it – sorry if it’s not the greatest quality. First things first – I used my Creative Station sticker maker to turn a 4.25″ x 5.5″ panel into a sticker – adding adhesive to the entire sheet. If you don’t have a sticker maker – you could just use paper and your favorite liquid adhesive.

I stamped a few colors at a time using a stamp from Lawn Fawn’s Let’s Bokeh stamp set on the sticker panel I made. I used a standard hole punch to punch each of these color dots, peeled off the backing and matched the color swatches to the corresponding bottle. It’s tedious work but you only have to do it once. I’m so glad I did this with all my reinkers. I think this went by really fast – I was able to do my my Lawn Fawn, MFT and Catherine Pooler reinkers last night.

Distress inks are different because they’re in glass bottles and have a dropper top. Since the tops are rubber, there’s no way to keep a swatch on top. I saw this swatching method years ago and thought I would give it a go today. Again, I created a sticker panel using my Creative Station. Please note that the Creative Station I have is old. There is a newer version available and I will link that one below.


I stamped the colors using a bigger circle from the same Lawn Fawn Let’s Bokeh stamp set and used a small 1/2″ punch to cut out the smaller circle you see in the image above. Then, I used a 3/4″ punch to cut out a bigger circle – which looks more like a halo. The halo is the piece you need to put on the dropper bottles as a swatch. But since I don’t like to throw things away, I also repurposed the smaller circle as an ink swatch on the ink pad. The punches will be listed below in my supplies section if you’re interested in buying. EK Success makes circles punches in many difference sizes.

As I was doing these reinker swatches, I decided to also make ink swatches for each of the colors. I keep all my swatches in coin sleeves (as recommended by Jennifer McGuire). I’ll link the sleeves below also.
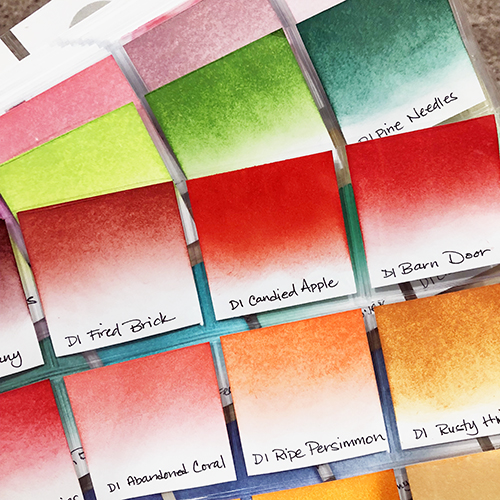
Here’s what my swatches look like in those sleeves. Ignore my sloppy handwriting – this took me a long time to do and I was in no mood to make them look perfect. Sigh…
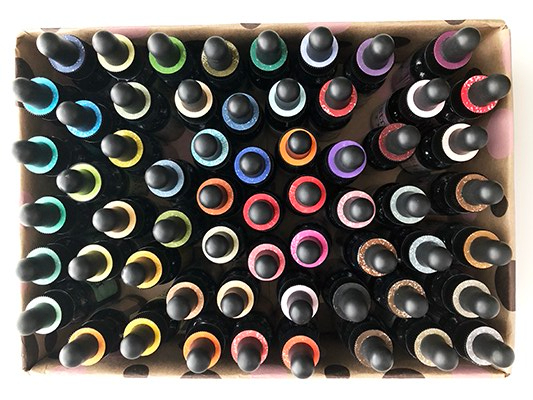
I think it’s great to be able to see the colors from above, don’t you? No more reading through 15 labels before finding the right bottle. I can just filter through the more obvious choices.
I’m not sure if this was helpful for you, but I appreciate you stopping by today! Tomorrow’s Monday and I’m not ready for another work week, but I hope it goes by quick for everyone!
XOXO,

SUPPLIES:
*NOTE: To view where these items can be purchased, click on the linked abbreviations below (SSS for Simon Says Stamp, EH for Ellen Hutson, AMZN for Amazon, LF for Lawn Fawn, MFT for My Favorite Things, LID for Lil’ Inker Designs, HMSB for HallmarkScrapbook, etc.). Affiliate links may be used (at no additional cost to you) – thank you for your support!
 LF Let’s Bokeh HMSB | EH | SSS | LF |
 Neenah Solar White 80 lb HMSB | EH | SSS |
 Xyron Creative Station |
 1/2 Inch Circle Punch |
 EK Tools 3/4 Inch Circle Punch |
 Coin Pocket Pages – for Ink Swatches |


Great idea Caly! Looks great. I don’t have allot of the refills yet, but will definitely try this as I buy them! TFS
LikeLiked by 1 person
That’s a big job, you did great! I have loads of this type of stuff to do but keep putting it off of course. Love seeing how organized other people can be at least, LOL!
LikeLiked by 1 person