Hi there!
I have a fun project to share today and it’s not a card! Doodlebug Design is known for their charming and whimsical designs and an assortment of products from stamps and dies to enamel stickers, colorful cardstock and so much more. Today’s project uses a lot of their adorable stickers to create framed wall art! They recently released Shadow Box Kits (fairy garden, autumn, halloween, winter, holiday, summer, etc.) in a variety of themes and I thought it would be fun to make one!
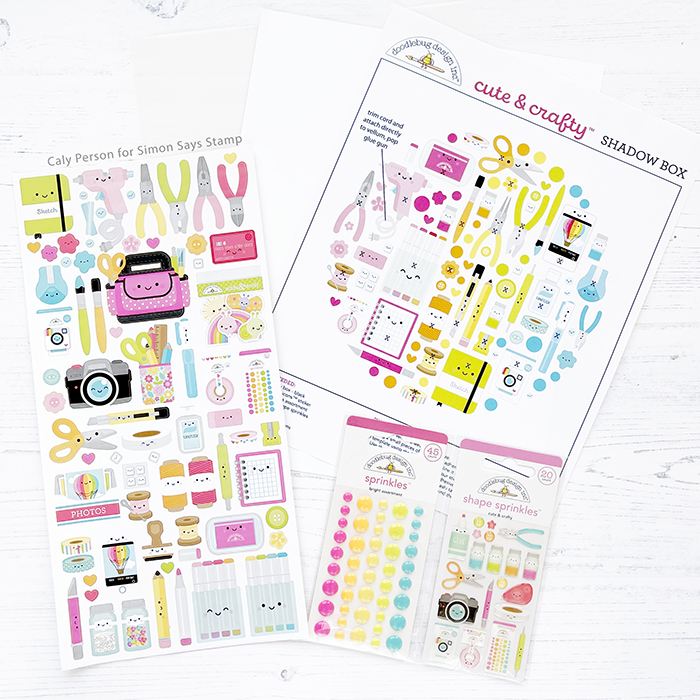
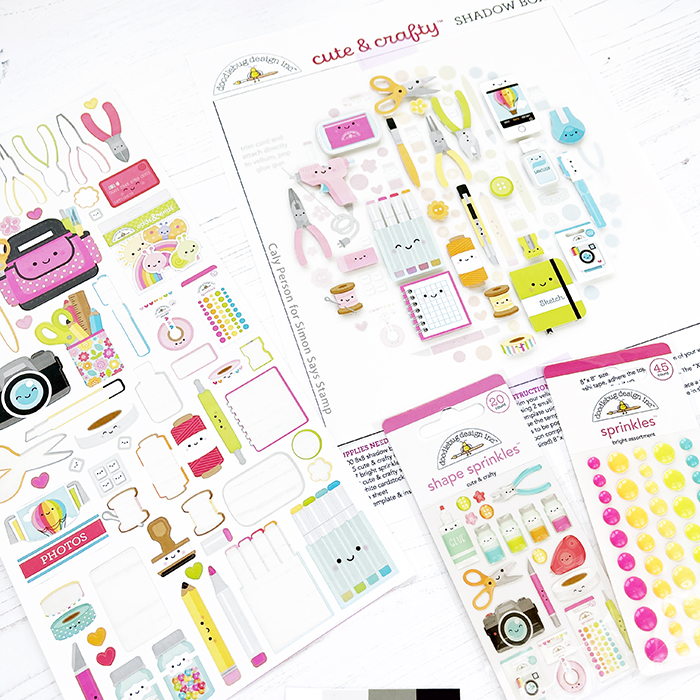
For my project, I chose the Cute & Crafty collection/kit. It comes with everything you need to create an adorable round layout. It’s a great value and covers the cost of the included stickers AND comes with vellum, white paper, and a template. Doodlebug has brown and black shadow boxes that are sold separately, so I used what I had at home and framed my finished project in a white frame.
Cute and Crafty shadow box collection contains one of each of the following Doodlebug products:
- Cute and Crafty Icons Sticker Sheet
- Cute and Crafty Enamel Shape Sprinkles Assortment
- Bright Assortment of Enamel Dot Sprinkles
- Vellum Sheet
- Color Template and Instructions
- 8×8 inch white cardstock
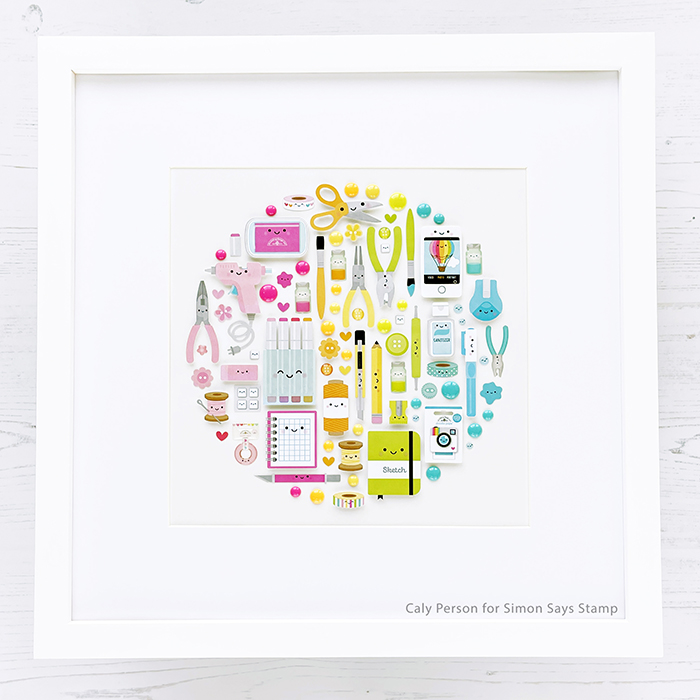
Following the instructions, I used temporary adhesive to attach the included vellum to the template provided. I started with the stickers that needed dimension (denoted with an “x” on the template) and it gave the art so much more interest. Because of this, I just left the glass out of my frame. If you got a true shadowbox, this would not be a problem.
You can see in the photo above that my vellum is adhered to my template and I’ve added all the stickers that required dimension from the Shape Icons sticker sheet. This is the most time-consuming part of the project, but SO worth the extra effort.

When done with the dimensional stickers, I started adhering images from the Shape Sprinkles sticker set first. Then, I finished with the Bright Assortment Enamel Sprinkles. It’s really so nice that the template below my vellum layer is color coded for perfect placement of those adorable stickers! When done, I peeled the vellum art off the template and adhered it to the inside of my mat, then backed it with a piece of white paper before putting the frame together to finish my project.

Isn’t it so cute?! I think these would make great gifts for friends and family in the different Shadow Box Insert Collections that are available. I hope you’ll check them out! If what you want is out of stock, be sure to hit that “Notify Me When Back In-Stock” link and fill out the information to get an email when the product comes back into stock for purchase!
I hope you enjoyed this! Thanks for visiting today!

SUPPLIES:
*NOTE: Affiliate links may be used (at no additional cost to you) – thank you for your support! To find out more about how affiliate links work and the companies I’m affiliated with, please check my Shopping/Affiliate Disclosure Page.
 DB Cute & Crafty Shadow Box Insert Kit SSS |
DB Cute & Crafty Shape Icons Stickers SSS |
 DB Bright Assortment Enamel Sprinkles SSS |
 DB Cute & Crafty Shape Sprinkles SSS |
 DB Cute as a Button Shape Sprinkles SSS |
 DB Black 8×8 inch Shadow Box Frame SSS |
 3D Foam Squares – Small SSS |
 Fiskars Titanium No5 Micro Tip Scissors SSS |
DESTASH SALE!
If you’re interested in buying some lightly used or unused products in mystery destash boxes, please check out my Destash Sale Page!


Hi, Caly – This is cute. I love Doodlebug products. They’re so adorable.
Lori S in PA
LikeLiked by 1 person
This was a fun non-card project!
LikeLike