Hi Everyone!
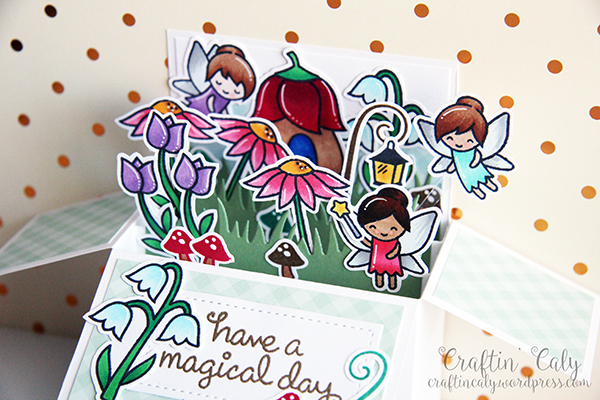
I wanted to share my fairy card-in-a-box with you today! These cards are seriously so fun to make and not every one will turn out the same – so many possibilities!

I made one for my neighbor to give to his wife and one to keep for myself. I’m learning that it’s more time saving to go ahead and make at least 1 extra (in case you mess one up or want to have one for another occasion). One of the most time consuming things is choosing colors and getting all the pieces cut – so if I can do double the amount of everything in one sitting, that’s a plus for me!
This is a horizontal card-in-a-box. Here are the dimensions that you will need for a card that fits in an A2 envelop (card size: 4.25″ x 5.50″):
Base: 4.25″ x 12″
With your base sitting horizontally, score at 2″, 5.50″, 7.50″, AND 11″
Turn you base 90 degrees so that it is now sitting vertically and score it at 2″
You will want at least 2 inserts: 4 11/16″ x 1″, scored at 5/8″ from each end to fit inside the box.
I know I have mad skills when it comes to drawing using the Paint tool…but don’t laugh at me. Here’s a visual for those of you who like to see it:

The “dotted” lines are what you want to cut for the flaps on your box card. You’ll also want to cut away the gray areas in the image – saving only a small tab at the bottom of the box to adhere and construct your box.

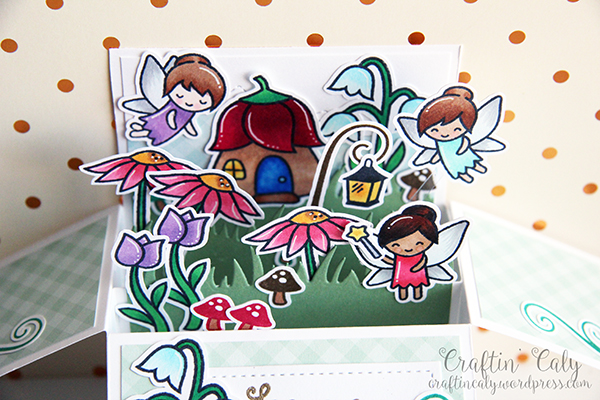
I cut out some grassy borders for the two tabs and them started gluing everything on in random places until I was happy.
The final thing was matting the box – you can do this however you like. I had lots of extra pieces so I used them to decorate the front panel. When closed up, The box is plain – I didn’t feel the need to make the card bulkier by adding more patterned paper – but feel free to do whatever makes you happy!
I hope you enjoyed this card! It really makes me happy 🙂
XOXO,

SUPPLIES:
*Disclaimer: I am not being paid by any company to promote their products. I make cards using stamp sets and materials which I love and I love to share. To view where these items can be purchased, click on the linked abbreviations below (SU for Stampin’ Up!, SSS for Simon Says Stamp, EH for Ellen Hutson, AMZN for Amazon, LF for Lawn Fawn, MFT for My Favorite Things, etc.).
Copics: E50, E31, E35, E55, E37, E49, Y02, Y17, BG000, B01, B28, R20, RV23, R14, R29, R39, V12, V15, YG09, G19
 LF Fairy Friends EH | SSS | LF |
LF Puffy Clouds Border |
|
 White/Gray Big Shot |
 Memento Tuxedo Black Ink EH | SSS | AMZN |
 Real Red Ink |
 Emerald Envy Ink |
 Soft Suede Ink |
 Recollectons 12×12 White |
 MFT Homespun Gingham Paper Pack EH | SSS | MFT |
 Wild Wasabi Cardstock |
 Neenah Solar White 80 lb EH | SSS |
 ATG Gun EH | SSS | AMZN |
 Mini Multi Medium Matte Glue EH | SSS |
 LF Small Stitched Rectangle Stackables EH | SSS | LF |
 Absorber |
 SU Clear Block Bundle |
 SU Simply Scored |
 Teflon Bone Folder EH | SSS |
 Sakura Gelly Roll |


Adorable box Caly and thanks for your great instructions! The measurements are very helpful!
LikeLiked by 1 person
You’re welcome, Jane! And thank you!
LikeLike
Ooh, Caly, what an adorable card in a box! You are so sweet, and I love the little fairies. So glad you made two. I often make multiples myself. Thanks for the great instructions, and I wish I hadn’t bought a Silhouette Portrait a few years ago. I’ve heard such great feedback about this machine. Glad you have it and are using it so wonderfully! Hugs and love! xoxo
LikeLiked by 1 person
You could always sell your silhouette and buy a scan n cut 2! I know I’m great at enabling you! 😂😅😘
LikeLiked by 1 person
That thought did go through my mind! LOL! xoxo
LikeLiked by 1 person
It’s worth it! Make it happen, Cheryl! 😜
LikeLike
Haha! I will have to think about it. Perhaps for my birthday?! 😜
LikeLiked by 1 person