Hi, Friends!
My Favorite Things’ November Release is here and I’m excited to be a part of it! MFT sent me a few of their new products to play with and I was so excited that this new Peek-A-Boo Wheel die is one of them! If you don’t already know…there’s a special place in my crafty heart for interactive cards.
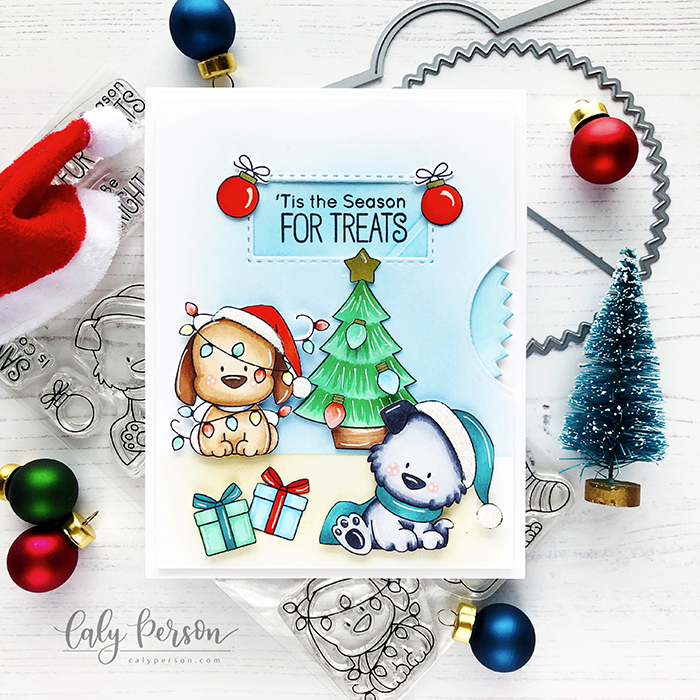
I used the Happy Pawlidays stamp set for this card. I got the set last year because I loved it so much but never got a chance to create a card with it so I decided this would be the perfect opportunity! I colored the images for the Daily Marker 30 Day Coloring Challenge earlier this month. P.S. I’m pretty sad I’m too busy to participate in the coloring challenge every day this month.

Copic colors used: C0, C2, C6, C7, G00, G02, G03, G09, BG57, BG18, Y0000, Y04, B000, B12, R20, R21, R05, R24, R29, E30, E31, E23, E25, E47
After coloring, I fussy-cut the images. I wish I could get dies for everything, but when I can’t, I tend to fussy-cut up to the image lines. After cutting, I added Ranger Startdust Glitter Stickles to the white areas of the hats and allowed it to dry while I worked on the wheel card.
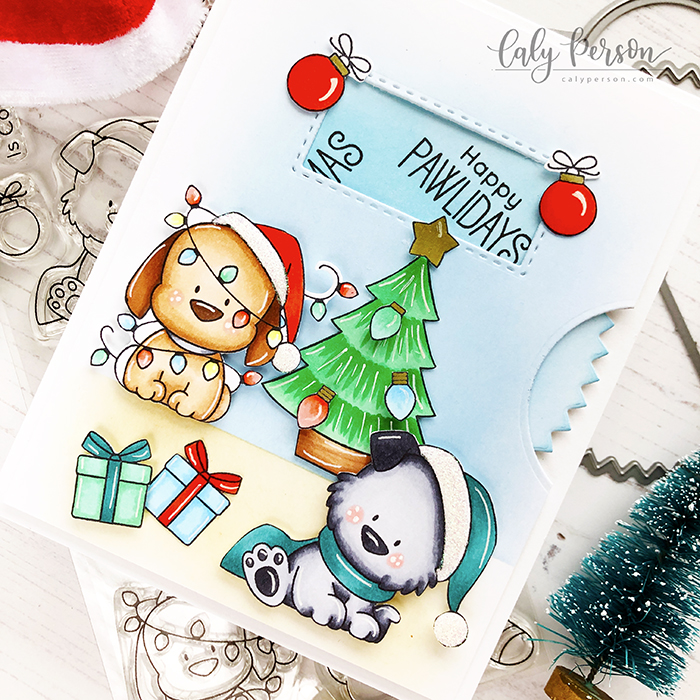
To create the wheel card, I die cut the wheel out of 110 lb cardstock because I wanted this piece to be sturdy. I knew that I wanted to use the sentiments from the Happy Pawlidays stamp set so instead of using one of the speech bubbles that comes with the die set, I used an Inside Out Rectangle STAX die (the smallest in the set works great for these sentiments). Before stamping, I ink-blended Tumbled Glass Distress Oxide ink over the wheel because I want it to match the card front. Placing the wheel inside my MISTI, I was able to put the rectangle die in the same spot with each 90 degree turn using the gridlines on the MISTI to ensure the sentiment rotates to fit inside the rectangle window each time. The wheel is secured to a wheel base (smaller circle) using a small brad and is then mounted on dimensional foam tape so that it spins freely. Before adhering the wheel to your card base, make sure you work on your card front first so that it all lines up correctly. I’m sorry if this is hard to follow – but I’m almost certain MFT will have a detailed video tutorial.
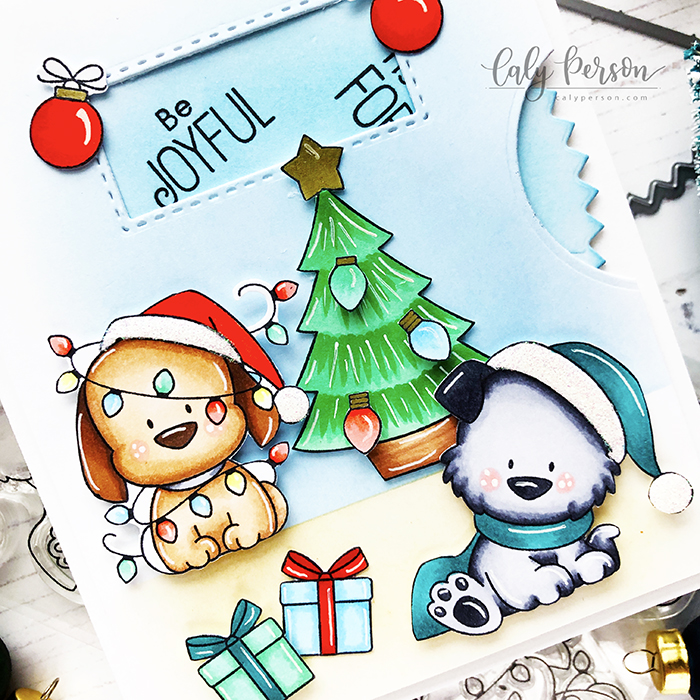
To create my scene, I did some masking and lightly ink-blended Vintage Photo Distress Oxide ink for the floor and Tumbled Glass for the room. At this point, I lined up the Wheel portion through the window to make sure the sentiments are visible, then adhered the wheel to the cardbase (only the wheel is attached to the cardbase at this point. Then I began adhering the images onto the card front, adding some directly and some using dimensional foam adhesive. These scenes can be as simple as you want – because the fun part is playing with the wheel! I hope you enjoyed today’s project and that you’ll join me back here in 2 days to see 2 more cards that I’ve created using new MFT dies. Thanks so much for stopping by today!
XOXO,

SUPPLIES:
*NOTE: To view where these items can be purchased, click on the linked abbreviations below (SSS for Simon Says Stamp, EH for Ellen Hutson, MFT for My Favorite Things, etc.). Affiliate links may be used (at no additional cost to you) – thank you for your support!
 Peek-A-Boo Wheel |
 MFT Happy PawlidaysHMSB | EH | SSS | MFT |
 Sizzix Big Shot ExpressSSS | SBC | AMZN |
 Copic Sketch MarkersEH | SSS | MERRIARTIST | ScrapbookPal |

Sakura White Gelly Roll |
 Tsukineko Jumbo DauberHMSB | EH | SSS | AMZN |
 Tim Holtz Distress Oxide Set 1EH | SBPal | SSS |
 Tim Holtz Distress Oxide Set 4EH | SBPal | SSS |
 Memento Tuxedo Black InkHMSB | EH | SSS | AMZN |
 Hammermill Color Copy Digital Cover 100lb |
 Recollections 110 lb |
 3M Scotch Foam TapeEH | SSS | AMZN |
 ATG GunEH | SSS | AMZN |
 Glossy AccentsHMSB | EH | SSS | AMZN |
 Absorber |
 Martha Stewart Mini Scoring BoardEH | SSS |
 MSP Mini MISTIHMSB | EH | SSS | MSP |
 MSP Mini MISTI Mouse PadHMSB | EH | SSS | MSP |
 Teflon Bone FolderHMSB | EH | SSS |
 Ranger Stickles – Star Dust Glitter GlueEH | SSS |


Oh my stars! A paw-fectly sweet Christmas card in every way! Adorable pups, a cheery festive scene and delightful peek-a-boo window sentiments! LOVE!
~carol
LikeLiked by 1 person
Thanks, Carol!
LikeLike
Such a fun and cute interactive card. Love the look of these borderless images though it is quite time consuming to fussy the images. It’s worth it though!
Was curious if you used the Hammermill paper for the images as I did buy some myself recently and was curious if they held up during coloring.
LikeLiked by 1 person
I just recently started using the Hammermill paper for coloring and I think it’s holding up great! It doesn’t bleed as much-but I think it takes a bit more effort to blend (which I’m ok with bc the bleeding scares me…ha!). I also think that the paper is smoother than Neenah and is great for ink blending-which I love to do on all my cards. I highly recommend it bc it’s half the price!
LikeLike
Thanks for sharing your insights. It’s great to know that the Hammermill paper works well for coloring/ink blending and the reasonable price point is a plus.
I’m still working up the courage to do more ink blending.but your beautiful backgrounds are definitely an inspiration. I don’t have too much luck with the daubers or the felt tools but maybe the new brushes that many crafters are using is what I need to try for a more seamless blended look.
LikeLiked by 1 person
The brushes are great-but the ink transfer is subtle if you like a softer look. I personally love the jumbo daubers. They are pricey but I honestly have 6 for each color and I just use it for like colors and it works wonderfully!
LikeLike
I do have a spare giant dauber. I should give it another try before it disintegrates on me since you gave it such a vote of confidence. (It happened once with an older one I kept around for while)
LikeLiked by 1 person
wow. this is so very new and creative! I love it
LikeLike