Hi, Friends!
I’m absolutely thrilled to be hopping along with the ladies from The Greetery today to share inspiration with you from the new Love Letters Release! Today, we’re showcasing the following products:
Sketchbook Roses stamps + die
Sentiment Suite Love stamps
Written in Ribbons stamps + dies
Let’s Have a word: Beautiful die
BotaniCuts Rose die
I used ALL of these products and made three cards so let’s dive right in!
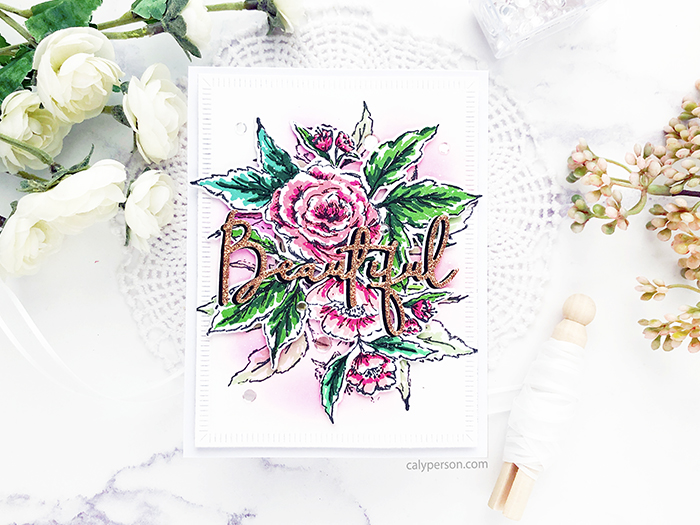
My first card features the Sketchbook Roses. I love that stamping with layered stamps can produce such beautiful images – especially when you don’t have time to color. I stamped and die-cut my image and then worked on my background by repositioning the main stamp and only stamping the green for the leaves bc I knew the main image would cover most of it up. Then I ink-blended some Worn Lipstick around the foliage. Before adhering my image, I used the Crimped Frame give my card a decorative border.
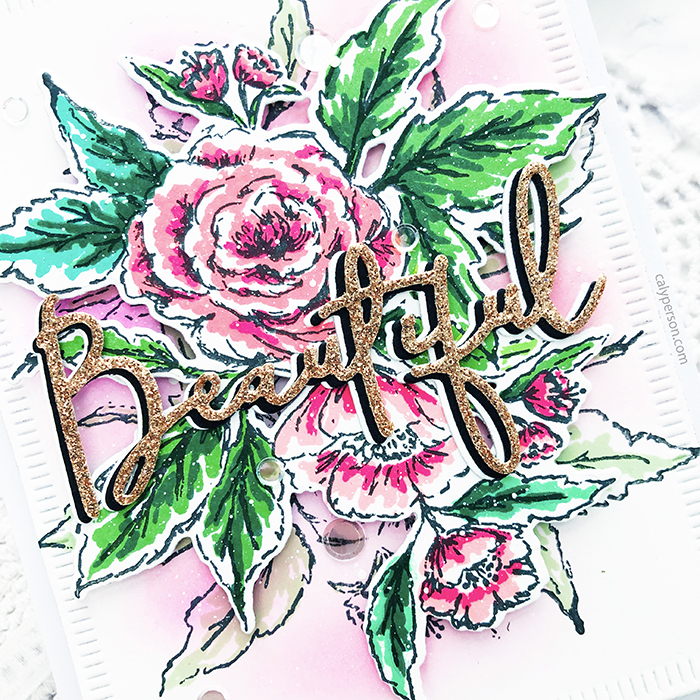
I added my main image with foam adhesive, then splattered the panel with white ink. My sentiment is die-cut from the Let’s Have a Word: Beautiful die set. I die-cut three layers to stack and create drop shadows with each layer in gold, white and black cardstock. To give my card its final finish, I added clear confetti sequins throughout.
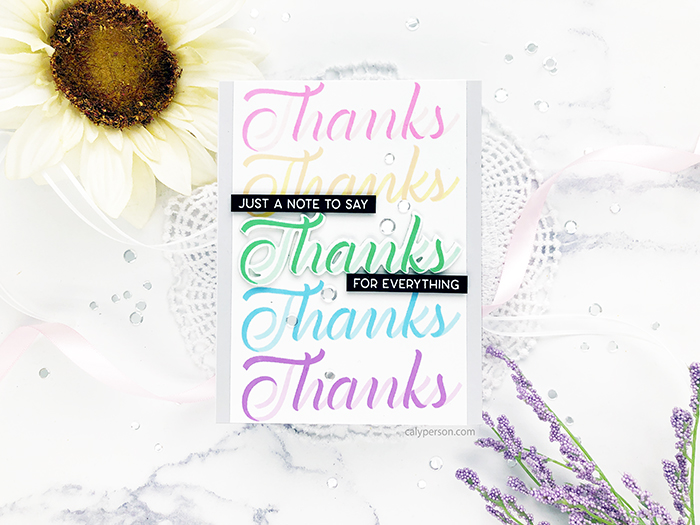
My second card features the new Written in Ribbons. There are several sentiments but I decided to do some repeat stamping with the word “thanks” using rainbow colors. This stamp-layering set is so easy to put together and the coordinating dies gives you more creative freedom!
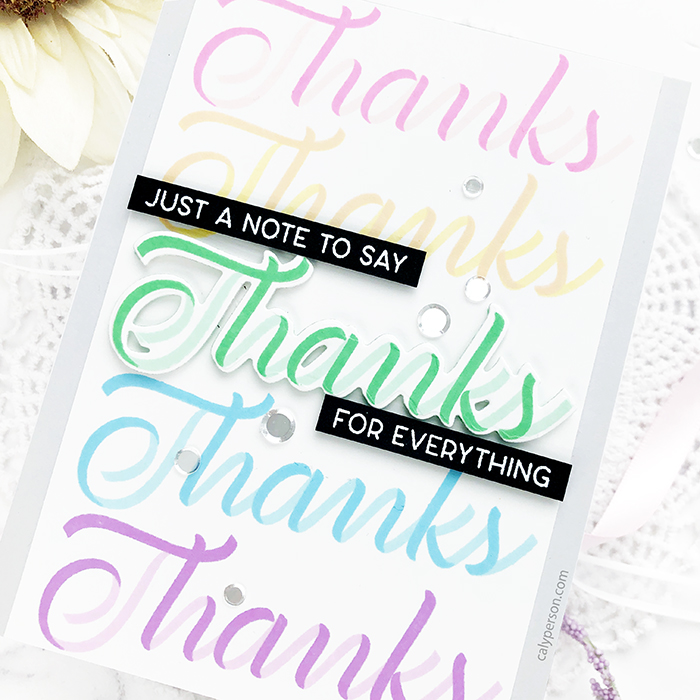
I only die-cut the middle green word to prop it up for dimension before adding embossed sentiment strips. I trimmed my panel to add gray cardstock to the sides and finished my card by adding a few clear flat confetti sequins.
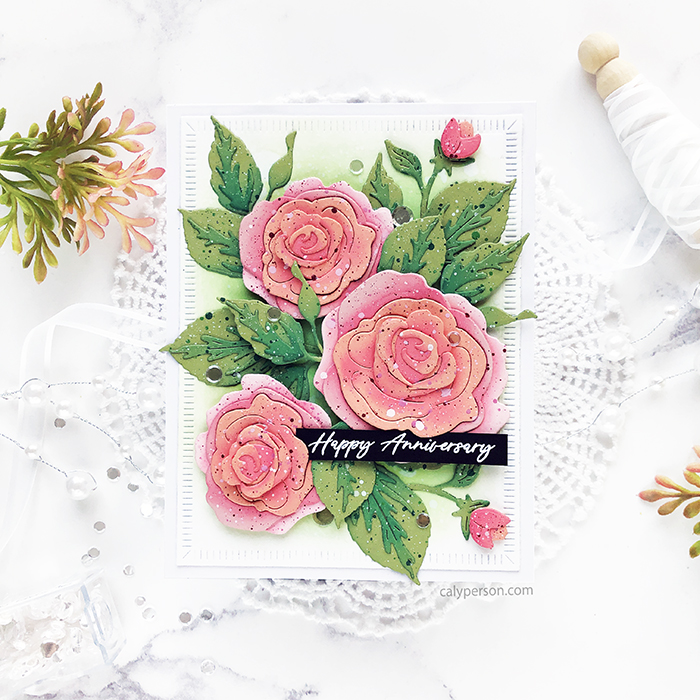
Last but not least, I present you the BotaniCuts Rose! Layered die-cuts can create so much natural dimension depending on the colors you choose and how you color. For my card today, I die-cut my roses with pink and green cardstock in a few different shades. To give each layer more depth, I ink-blended with Worn Lipstick for the roses and Pine Needles for the foliage.
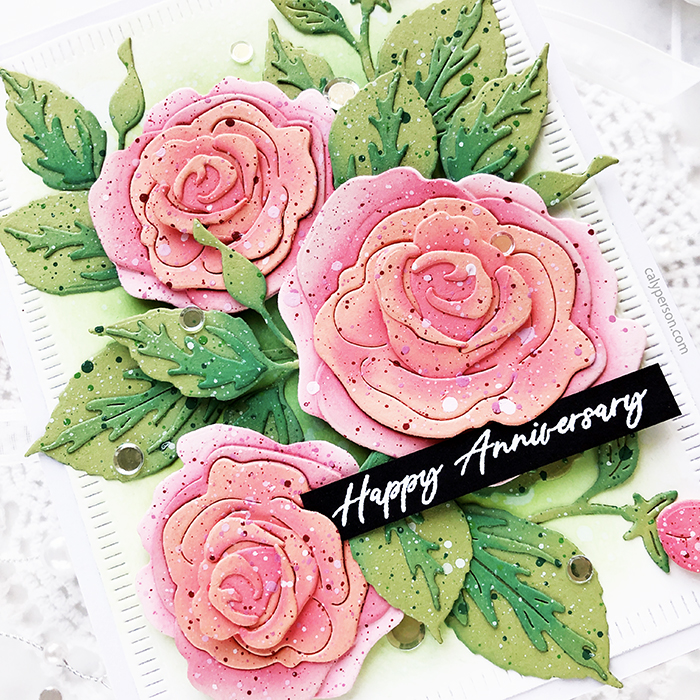
After layering and adhering all my layers, I splattered them with coordinating paint colors as well as white patin. My background is ink-blended with Twisted Citron Distress Oxide Ink before die-cutting with the Crimped Frame die. I adhered my roses and leaves to create my floral spray, some directly to my card panel and others with foam adhesive for dimension. To finish, I attached an embossed sentiment and more flat clear confetti sequins.
I hope you enjoyed my projects today!
GIVEAWAY:
There is a $50 gift certificate up for grabs. Be sure to leave a comment below and along each of the blog hop stops for your chance to win!
BLOG HOP LIST:
Kay Miller
Laurie Willison
Dawn McVey
Heather Nichols
Keeway Tsao
Angelica Conrad
Lizzie Jones
Kelly Luncefor
Norine Borys
Caly Person
Thanks so much for stopping by!


Lovely cards. My favorite is the botanical cut rose/
LikeLike
Ooh, what lovely creations, Caly! I think my fave is the Anniversary card you made with a bouquet of pretty pink BotaniCut Roses 🙂
LikeLiked by 1 person
Your cards are beautiful. Congrats on joining the blog hop!
LikeLike
Soooooo pretty!
LikeLike
Love the simplicity yet vibrancy of your ribbon thanks card.
LikeLike
The new release is fantastic and the colors that you used on your cards are great!
LikeLike
Lovely creations with these fabulous new prodcuts.
LikeLike
Your roses are gorgeous!! Love those botanicuts!!
LikeLike
Your cards are ALL showstoppers Caly, but the 1st card is my favorite…absolutely GORGEOUS!! :0)
LikeLike
Such inspiration here! Gorgeous cards Caly!
LikeLike